Let’s run through how to get Python up and running by installing Anaconda, one of its most popular distributions. Anaconda will include all of base Python, plus additional packages that you’ll find useful. Optionally, you can just get vanilla Python and manually add packages as needed but I’d recommend starting with Anaconda.
Installing Anaconda
First, head on over and download the latest version of Anaconda. It’s pretty straightforward when the installer is used so I won’t go into too much detail. The import things to check are covered in Anaconda’s installation documentation. Namely, whether you want to work with Anaconda as your base or default distribution of Python (I recommend yes, but to each his own) and whether to add it to your PATH environment variable. If you don’t know what that means then you don’t need to check that box. Besides, it’s not too difficult to add Anaconda to your PATH later on if its needed.
Most of the examples and tutorials here will assume the Anaconda distribution is used and most screenshots will use a lightweight IDE that Anaconda includes – Spyder. It’s got a cleaner interface than a lot of other popular IDEs and has a similar look and feel to RStudio, if you’re familiar with R. If you’ve got more experience working with other IDEs and want something with a richer feature set then I recommend Pycharm. For a beginner, I think simplicity is best so that you can focus on the Python and not the IDE.
Once you’ve downloaded and installed Anaconda by following these easy instructions, we should go over a few key tools to manage your distribution.
Managing the Anaconda Prompt
Now that we’ve finished installing anaconda, let’s play with it a little. Go ahead and launch command prompt (Windows Key + ‘R’ Key, following by typing in “cmd” if you’re on a windows machine).
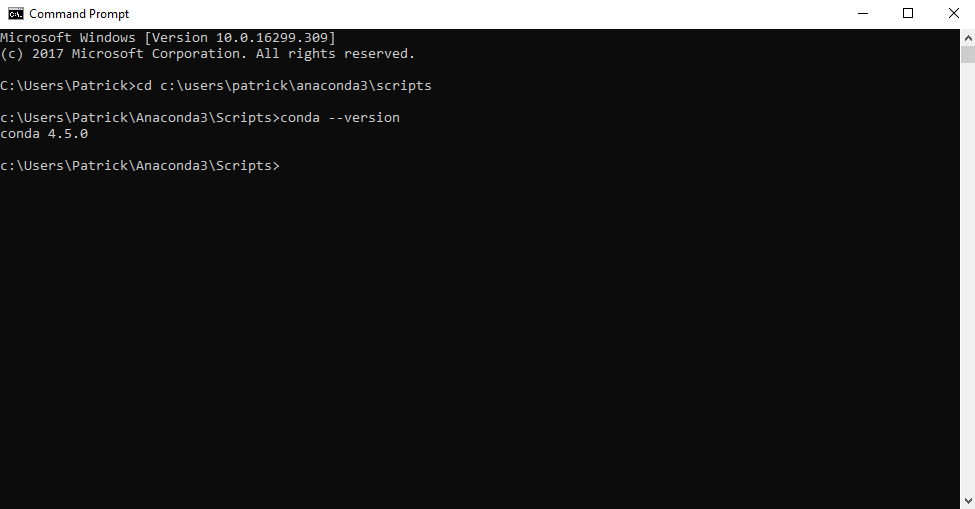
Once command prompt has launched, we need to direct it to the correct directory by typing in “cd” followed by the path to your installation of Anaconda. The command might look something like “cd C:\Anaconda3\Scripts” or “cd C:\Users\YourName\YourDocuments\Anaconda3\Scripts“.
Then let’s go ahead and check the version of conda that we’re running by typing in “conda — version”.
Here’s what I see when I follow the above steps:
Now we can manage the most important parts of our installation of Anaconda. Namely we can update conda as well as install, remove and update other packages. Just replace “package_name” with the name of the package you want to modify, such as “numpy”.
Install a package:
Try typing in: “conda install package_name” to install
Update a package:
Try typing in: “conda update package_name” to update the package
Remove a package:
Same idea: “conda remove package_name”
Enter python:
To run python from the command prompt we just type in “python“. You should see three arrows: “>>>” which indicate that you’re good to start scripting.
Exit Python:
We can exit python by typing “exit()“. You should see the three arrows “>>>” disappear.
Type “exit” one more time, this time without parenthesis and command prompt will close down and we’ve got a basic installation of Anaconda up and running. Next we’re going to write a few simple functions.